Hello to all my readers, I know I have been incognito for awhile but I appreciate your support as I found my way through some personal struggles that proved harder to navigate than I anticipated. But good news, I think I am ready to start putting posts out and I was very excited when I chose this article to be my first one back. Are you ready to start again? Here we go!
Do you have an avid DIY-er in your family? For many of us there is someone we know and love who would rather sit and work in the garage with their tools than do just about anything. So when my brother asked me to make a cake for my nephew who simply loves tools and working with them, I knew I couldn’t just make any cartoon style construction cake, I needed to up my game! So I came up with the idea of making a tool bench cake. But how would I make it amazing enough for a kid who uses real tools even at the age of three? Read on and find out all my tips and tricks!

Drafting Your Plan
This cake can be scaled up or down based on your party size but I knew I would need one recipe of my fan-favorite chocolate cake in a 9.5″ x 11″ pan. I wanted to give the cake dimension and add the classic workbench staple of brown peg board and thought for stability I should use rice cereal treats. I was under a time crunch so I used premade bars but you can make your own with any cereal you prefer. The best way to form it if you are making your own is in an appropriately sized cake pan, but you can freestyle it if you prefer. Now, this may sound crazy, but let your peg board dry out a bit before you decorate it! This may make it less tasty, but it will make it much more structurally sound. So while it is drying out, head to the store and locate a realistic looking plastic toy tool set. I know this is a bit of a cheat since we are trying to work on a realistic cake, but plastic toys are the easiest to clean and use for cakes. You will also want to pick up or make frosting and some graham cracker crumbs or crackers to make your own edible version of sawdust.

DIY Décor and More
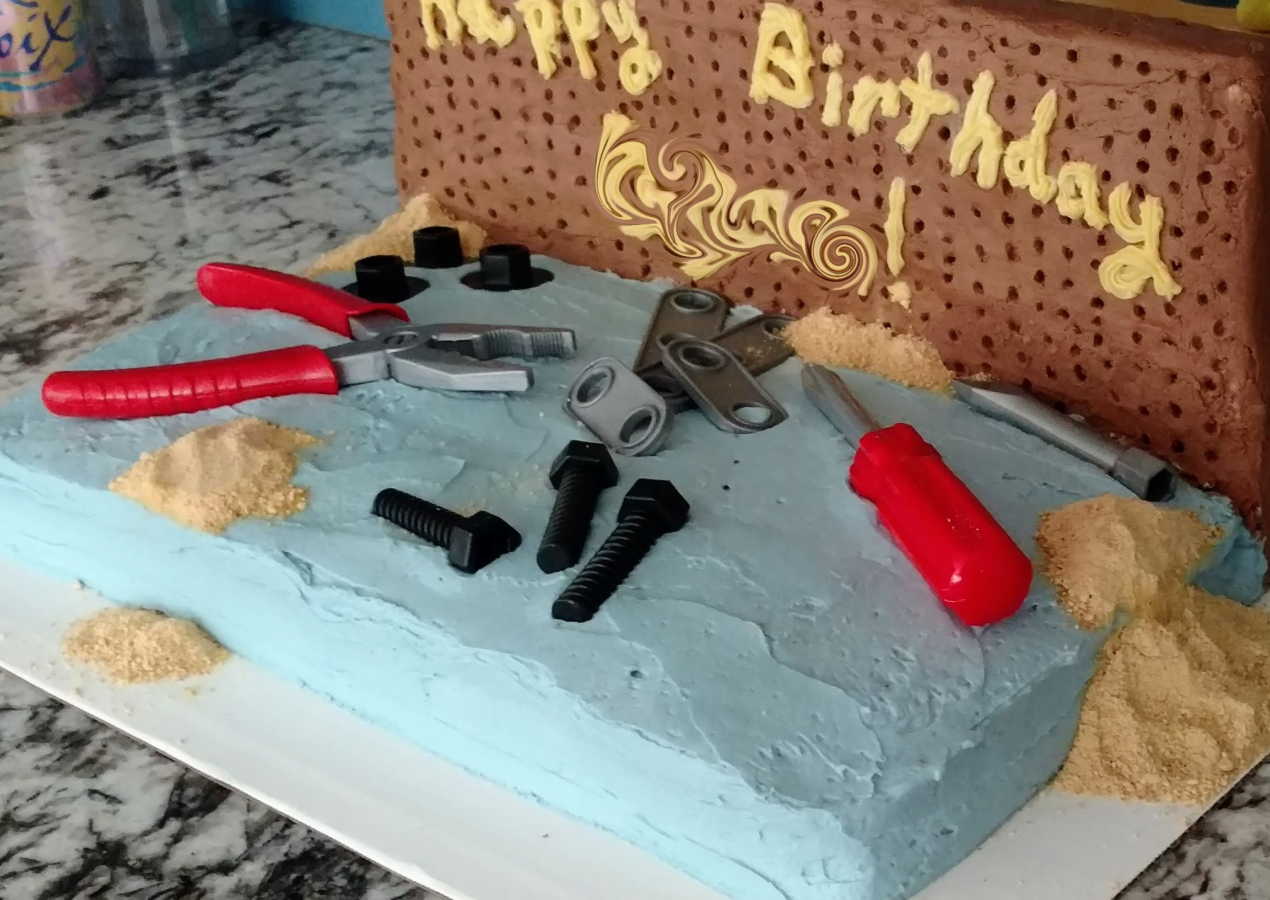
So now that you have all of your supplies, it is time to assemble your tool bench. Start with your cake which I frosted with a pale blue whipped frosting which gave it somewhat of a rough surface. I then connected the rice cereal treat peg board to the cake with frosting and several dowels, and frosted it with a chocolate frosting. To add the distinctive holes to the pegboard, I recommend sitting on a dining room chair while your cake is on a kitchen counter which should put you at eye level with the cake without hurting your back. Then take a thick metal skewer or or thin wood dowel and carefully poke holes in equal rows and columns all along the peg board. You may need to use your hand to steady the back of the board as you work, but don’t worry, you can touch up the frosting when you are finished. Finally clean up the holes by gently pressing your finger over each hole to smooth out the frosting that was moved by pulling the skewer out if it is rough.

Finishing Touches
Now you get to add all the fun parts! Use your favorite tip and colored frosting to add a birthday message, I went with a small star tip with yellow frosting and the classic “Happy Birthday Name!” on the pegboard. Next, take your tool toys and set them on the workbench surface in a way that makes it look like you are in the midst of a project. Depending on the toy you use you may have lots of options to choose from or just one or two but I know you can make it work. Next, take your graham cracker sawdust and create several piles around the tool bench. As you can see in the picture above I had some spill over onto the cake board which was fun but needs to be done at the location of the party instead of ahead of time to prevent messes and the dust getting everywhere.

A Very Happy Birthday
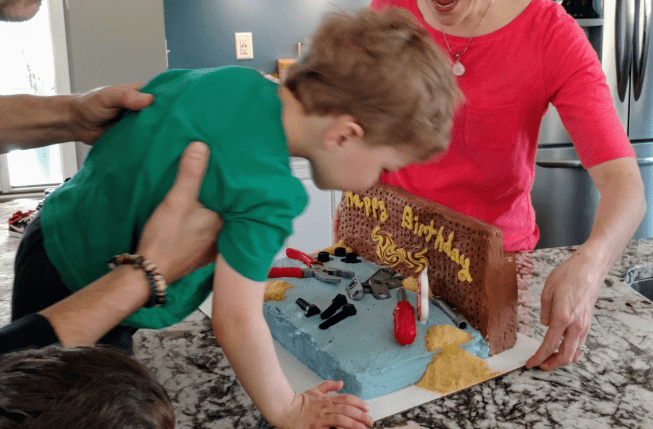
This is still one of my favorite cakes many years on. The birthday boy and his family loved the cake and everyone at the party was very impressed. I was even surprised to find that people wanted to eat the pegboard itself! The toys were added to the many he had already, but if you are making this for a grown up they can be washed and given to a child, kept for future use, or donated to a local daycare or school for kiddos to play with. I hope that this cake how-to helps you to honor the how-to enthusiasts in your life and that you find a way to make it all your own. Let me know in the comments below if you have made this cake and how it turned out! I am so so happy to be back again!


